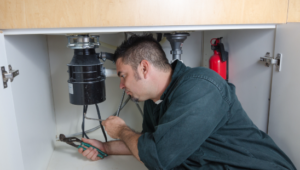
InSinkErator disposals have become indispensable fixtures in modern kitchens, making the disposal of food waste a breeze. However, like any appliance, they may encounter issues that require attention. Whether you’re experiencing a pesky jam or a mysterious leak, this InSinkErator repair manual will provide you with step-by-step instructions to resolve common problems. Let’s delve into the world of quick fixes and simple solutions for your InSinkErator disposal.
Diagnosing the Issue
To begin your journey towards a smoothly functioning InSinkErator disposal, you must first diagnose the problem accurately. When faced with an issue, such as strange noises or a unit that won’t turn on, take a moment to assess the situation. Is the disposal making a humming noise but not grinding food waste? Are there leaks around the unit? Different issues call for different solutions, so it’s crucial to pinpoint the problem correctly.
Unjamming Your InSinkErator
One of the most common issues with InSinkErator disposals is jamming. If your disposal unit refuses to work and produces only a low humming sound when switched on, it’s likely jammed. To fix this, follow these simple steps:
- Turn off the power: Begin by disconnecting the power supply to your disposal. Safety should always come first.
- Use an Allen wrench: Insert an Allen wrench into the hexagonal hole at the bottom of the disposal. Rotate the wrench back and forth to loosen the jammed object.
- Remove the object: Once the jam is cleared, use pliers or tongs to remove the foreign object causing the blockage.
- Restore power: Reconnect the power supply and test your disposal. It should now function smoothly.
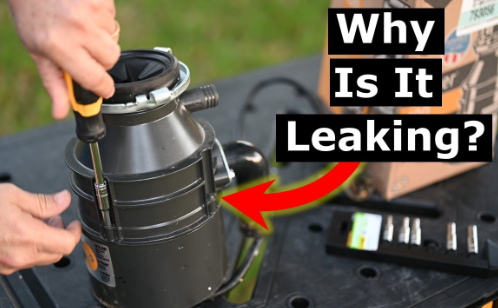
Fixing Leaks and Drips
If you notice leaks or drips around your InSinkErator disposal, addressing this issue promptly is essential to prevent water damage. Follow these steps to fix a leaking disposal:
- Identify the source: First, locate the source of the leak. Common areas include the flange, dishwasher connection, or discharge pipe.
- Tighten connections: If the leak is coming from a loose connection, use a wrench to tighten it. Be cautious not to overtighten, as this can cause damage.
- Replace damaged parts: If you identify damaged or worn-out components, such as gaskets or seals, replace them with new ones. You can find replacement parts at your local hardware store or online.
- Recheck for leaks: After making the necessary repairs, turn on the disposal and monitor for any remaining leaks.
Dealing with a Non-Functioning Unit
If your InSinkErator disposal refuses to turn on, it can be a frustrating situation. However, there are steps you can take to troubleshoot the issue:
- Check the power: Ensure that the disposal is receiving power. Check the circuit breaker or fuse box to confirm that the unit is not tripped.
- Press the reset button: InSinkErator disposals are equipped with a reset button located at the bottom. Press it to reset the unit and try turning it on again.
- Inspect the wiring: Examine the wiring and connections for any damage. If you find frayed wires or loose connections, it’s best to consult a professional electrician for repairs.
- Test the switch: If the disposal still doesn’t turn on, check the wall switch. Therefore, it may need replacement if it’s faulty.
Addressing Unpleasant Odors
Over time, your InSinkErator disposal may develop unpleasant odors. These odors can seep into your kitchen, creating an unpleasant atmosphere. Here’s how to combat this issue:
- Ice and citrus: Drop a few ice cubes and some citrus peels (e.g., lemon or orange) into the disposal. Turn it on and let the ice and citrus work their magic to clean and deodorize the unit.
- Baking soda and vinegar: Sprinkle baking soda into the disposal, followed by a cup of vinegar. Allow the mixture to fizz and clean the disposal. Rinse with hot water.
- Commercial cleaners: Additionally, you can also use commercial disposal cleaning products designed to eliminate odors. Follow the manufacturer’s instructions for best results.
Preventing Future Problems
Now that you’ve successfully repaired your InSinkErator disposal, it’s essential to implement some preventative measures to avoid future issues:
- Proper maintenance: Regularly clean your disposal by grinding ice cubes and citrus peels to keep it fresh and free from odors.
- Avoid overloading: Be mindful not to overload the disposal with too much food waste at once. Gradually feed in food scraps while running water to ensure efficient grinding.
- Use cold water: Always run cold water, not hot, when operating the disposal. Cold water helps prevent food particles from sticking to the unit’s blades.
- Avoid non-food items: Never dispose of non-food items, such as plastic or metal, in the disposal. Moreover, this can cause jams and damage.
Conclusion
In conclusion, InSinkErator disposals are remarkable kitchen appliances that make meal cleanup a breeze. However, like any machinery, they can encounter issues over time. With this comprehensive InSinkErator repair manual, you now possess the knowledge and steps to troubleshoot and resolve common problems. From unjamming your disposal to fixing leaks and addressing odors, you have the tools to keep your kitchen running smoothly. Remember to prioritize safety and consult a professional if you encounter any issues beyond your expertise.